

Have you noticed how software authors and online service providers are very clear about where their responsibility begins and ends? I don’t fault them. It’s good business to be clear. But it doesn’t help a user that’s struggling to figure out what to do. The WordPress install itself is extremely easy BUT it depends on having a place to install it! I’ve had dozens of clients come to me because they simply didn’t know what to do. 5 minutes on the phone and I could hear their shoulders relax and their pulse slow down. In this post I’ll tackle the basics of getting ready to install WordPress – the stuff you should know and do before you even download and install WordPress.
A word about usernames & passwords
Before we get started, you’ll need a plan to save and easily access secure usernames and passwords. Please take these seriously. WordPress uses a default administrator username of – you guessed it – admin. Please don’t make it easy for a hacker to guess the admin username (or the password) – that’s half the battle to gaining access to your site. If you haven’t got a good system for usernames & passwords then buy a copy of RoboForm. It’s a lifesaver. I use passwords that are at least 13 characters long (a mix of alphanumeric and the funny ones like #$%@). They could be any length but just bare in mind sooner or later some hacker will focus on you and run a bruteforce attack on your WordPress install. The longer and more complex, the better your protection from this attack.
The cast of characters
Domain Names
The first thing you need if you’re going to self-host is a domain name. A domain name is nothing more than a pointer. lorax.wpengine.com is a domain name or more specifically a TLD (Top Level Domain). A sub-domain would include the stuff before the domain like so: www.lorax.wpengine.com or store.lorax.wpengine.com. Back before we had domain names, we used IP addresses to get to websites but they were rather hard to remember so domain names were born. Easier to remember loc.gov (Library of Congress) than 104.147.249.71. But as a pointer, a domain name has to point to something! When you first buy one it is “parked” at your domain name registrar and points to their server. That’s not good for our purposes.
Domain Name Registrars
Domain Name Registrars are the folks that sell you a domain name only you don’t actually own a domain name – you rent it on an annual or longer agreement. The current manager of all domain names and registrars is currently ICANN (Internet Corporation for Assigned Names and Numbers). All registrars must signup with ICANN and are regulated by ICANN. A domain name will cost you between $5 – $70. And no, the higher price doesn’t equate to better service. Average price for good service should be in the $10-$15 range.
Website Hosting
Once you have a domain name, you need a place for your website to live on the web – a web server. Web servers are nothing more than powerful computers connected to the Internet that run the software (like Apache & PHP, etc) that make websites work. Self-hosting refers to buying a hosting account at one of the many hosting companies. This account will require a credit card. Most hosting companies offer at least a monthly and yearly fee structure. Obviously, buying a year’s worth of hosting saves you $$ in the long run. Read the terms for the obvious items like termination and other what if scenarios. Make plans for backups (more on this in another post). All entry level hosting accounts will use what’s called shared hosting. This refers to sharing one server (the web server) among a number of different accounts/websites. You will likely buy what’s referred to as a Virtual Private Server (VPS) or virtual machine. Simply put, you won’t be able to see the other accounts and the files and directories on the server will appear as though you have the whole computer to yourself – but you don’t. Once you sign up you’ll be given an account with username & password. Save these in a safe place – don’t skip this step!! This is where a password manager will help – it will do it pretty quickly. Onward!
Hosting accounts come in pieces
There are four (4) pieces to the hosting account that you’ll need to work with. Don’t panic when you read the details. All hosts provide a support forum and FAQs. Find the FAQs and read them before you sign up. Browse the forums to get a sense of the issues others have had and how quickly or not they’ve been helped. Remember to read these with a grain of salt. Some people have axes to grind. If the host you’re considering doesn’t have either FAQs or a support forum, find another host (here’s a list). The FAQs are key for you to learn what you need to setup and use the following pieces of your hosting environment. There are too many different possibilities for me to cover the details here so find the online docs AND support forum.
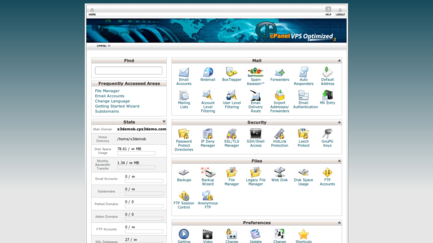
A screenshot of cPanel
- The control panel – which allows you to configure the hosting environment like cPanel or Plesk. Don’t be nervous. They look more intimidating then they are. If you get to choose go for cPanel. It’s more intuitive and easier for beginners. All of the next items on this list are likely available through your control panel.
- FTP Access – the protocol for file transfers (fancy word for the way we upload/download files between your computer and your website). Most hosting providers will give you a default FTP access often the account username and password. It’s fine to use the default but keep it safe. I use a program called Filezilla (for PC) – the Client version.
- Email. Your web hosting account will most likely include an email server that will handle mail associated with your new domain – like bob@somebiz.com. You’ll need to make decisions on what email addresses you want and how they’re configured. If you don’t have an email server, then it gets a bit more complicated than I want to cover in this post. Look for a host that includes email as part of their offerings to make it easier for you.
- MySQL Database. Stay calm, it’s easy. Most hosting providers include a tool called PHPMyAdmin that will allow you to create the MySQL database and the user. What you need to be sure of is your hosting account includes at least one MySQL database and some form of database administration tool (PHPMyAdmin or other). User’s can have different levels of permissions to access the database we create. The user will be WordPress. Read the WordPress guide on creating the database and user. If you get to choose a username and password (likely) please make them hard to guess. Personally I use a minimum of 13 alphanumeric characters on the pwds and my usernames are not easily guessed.
A word about email
The default email address
By default the email server associated with your domain will have at least one email box already setup. This is likely to be the same username you signed up with or one the host made up for you. Even if you don’t use this, you’ll likely need to check it and clean it out because this account will collect spam and other junk emails. If you don’t clean it out, it will fill up and eat up some of your limited disk space (many hosts limit how much disk space you can have).
POP3, IMap, or Forward?
This is where you need to choose how you want your email setup. POP3 and IMap use your mail server to handle email associated with your domain. You’ll need to read the FAQs or visit the help forum at your hosting provider to learn more about how to set these up and use them. Personally, I prefer to use email forwarding. Email forwarding is what it sounds like. All mail that comes in to an email address associated with your domain (info@somebiz.com or tammy@somebiz.com for example) can be forwarded on to another email address. This is useful for branding purposes so you can have an email address associated with your domain but forward inbound email to your GMail account for example.
Outbound email using Outlook or whatever the Mac equivalent is
Using a locally installed email program (called a client) you can send email out a few different ways. Outbound email (SMTP) can use your mail server (if your host allows it) or it can use your INet provider or it can be sent to some other email service. Configuration instructions for using an email server that comes with your web hosting account are typically included in the FAQs or Support Forums at your web host. Outbound mail can also use the mail server at your Internet provider. This tends to be a hassle if you travel and try to send mail from anyplace where you use a different Internet connection – like a hotel or conference. Your email client wants to talk to your INet provider at home but your computer is not within the INet provider’s network when you’re away. So it is treated with suspicion and you may not be able to send email! This is why I don’t recommend using your INet provider’s email servers.
Webmail services (like GMail)
Personally I like the convenience of using webmail services. Webmail just means it’s a web based email service. I use GMail and Zoho to manage all my email accounts. I can setup aliases for outbound email so it looks like it came from my domain. A big advantage of webmail is that you can access it from multiple computers and don’t have to deal with the security issues that come with using an INet connection that isn’t your provider’s.
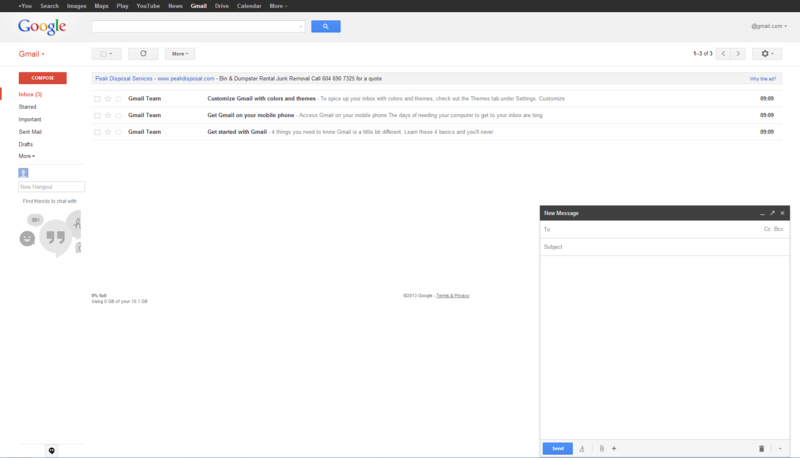
Screenshot of GMail
What if I need help with hosting or email?!
All hosting providers have a way to get help. Typically support is offered in the form of a
- support forum,
- support documents (library, guides, instructions – pick a label),
- a ticketing system (helpdesk),
- online chat,
- email,
- and/or phone number.
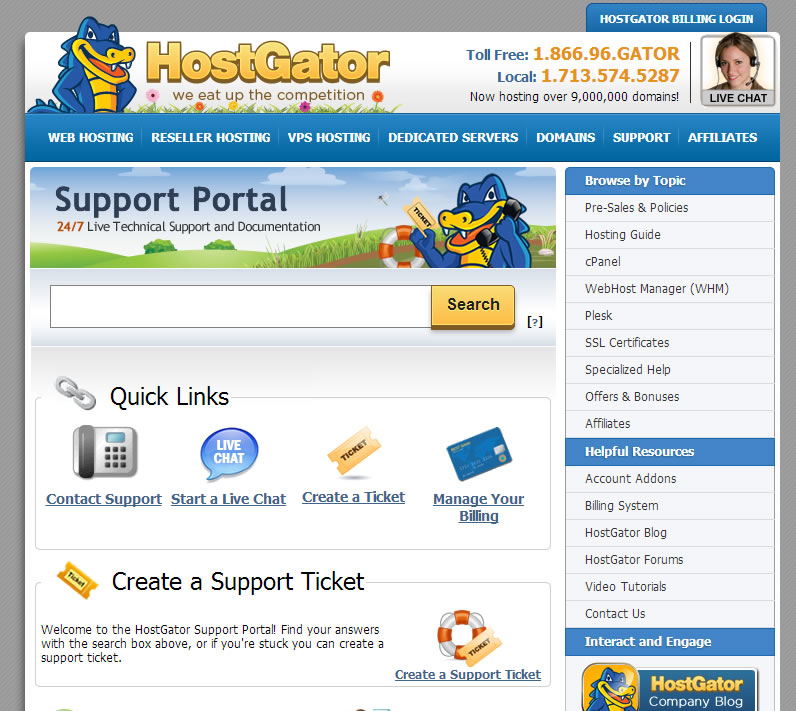
Screenshot of Hostgator’s Support Portal
Each hosting company tends to favor one or two different methods. A bit of trial and error on your part and you’ll likely zero in on the best one to use.
Time to point the pointer (domain name)!
The last step before you get to the WordPress install is to point your domain name to your hosting account. The host will likely send you instructions on how to do this but if they don’t. Find those FAQs or the Support Forum. What you typically need to do is to locate the Name Server information provided by your host. Then go to the domain name registrar and make the changes to the DNS settings there. This will create the pointer so that all requests for your domain name will be sent to your website at the host.
On to WordPress!
Then it’s a matter of following the famous 5 minute install – uploading and configuration of the WordPress files before upload, installing and documenting the user/pwd and then configuration of the WordPress install. Eg. configure the base install of WordPress, upload and configure the theme, then start in! Did I miss something or something isn’t quite clear? Please leave a comment below and I’ll update this document.
![]()
Comments
Hi Gregg,
When I go to Go Daddy to select my domain, they have an option to “Protect yourself with Private Registration! Hides your personal information – name, email, address and phone number – in the public WHOIS directory
Prevents domain-related spam
Helps stop domain hijacking
Helps protect against stalkers and harassers
Protect your personal information.
Keep my personal info public
Make my domain private”
This “Make domain private” option is $7.99. I have a difficult time paying to prevent stalking. Shouldn’t that basic human right come with a domain purchase? It is under duress that I opt-in to such add-ons. Do you see any other way?
Hi Jan,
You might think so but it is their service and part of the marketing strategy – sell you a domain for low cost then get you to pay for add-ons. In the larger scheme $8 to protect your privacy might be worth it but in reality, your name is already all over the Inet. And unless you want to spend your time reading through every Terms of Service document before you sign up for something and checking to be sure your privacy is private (a huge challenge), it might be better to just accept that being online means being out there and exposed.
If you are harassed or stalked, that’s a different matter. Learn more here http://www.ncsl.org/research/telecommunications-and-information-technology/cyberstalking-and-cyberharassment-laws.aspx.
Thanks, Gregg.